

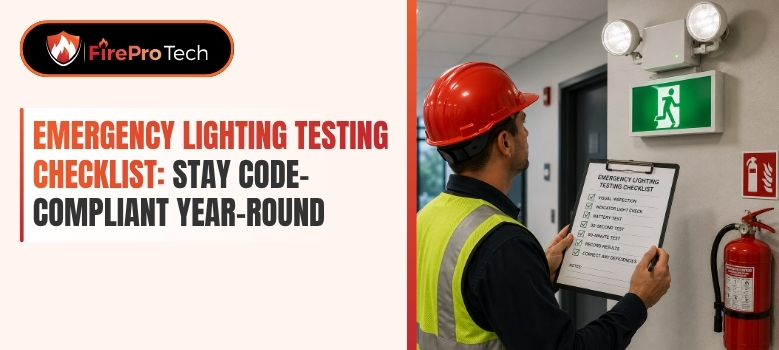
Emergency lighting testing checklist work can become difficult to manage when exit fixtures are spread across several floors, tenant spaces, stairwells, corridors, and exterior discharge paths. A light that appears normal during business hours may still have a weak battery, obstructed illumination, damaged wiring, or an outdated test record.
For business owners, facility managers, property managers, and contractors in Houston, the goal is not simply to switch a fixture on and off.
The goal is to verify that emergency and exit lighting services can support safe movement during a power interruption, document what was tested, and address deficiencies before they create a safety or compliance problem.
This guide explains what to inspect, how to organize testing throughout the year, what records to retain, and when professional emergency lighting services from FirePro Tech, LLC may be appropriate.
An effective checklist turns a broad compliance responsibility into a repeatable field process. It should help the person performing the work identify each fixture, test the correct operating condition, record the result, and escalate any failure.
It should also account for the fact that emergency lighting is not limited to illuminated exit signs. Battery-backed luminaires, remote heads, pathway lighting, control equipment, and related components may all affect egress visibility. The emergency lighting testing checklist should include this detail.
The exact procedure should be based on the installed system, the manufacturer’s instructions, the building’s fire and life safety requirements, and the authority having jurisdiction. A checklist is a management tool, not a replacement for the applicable code or a qualified evaluation of a complex system.
Before testing begins, create or update a fixture inventory. Assign each emergency light and exit sign an identifying number or location description that a technician and facility representative can understand. A useful description might identify the floor, room or corridor, nearby stairwell, and fixture type. Understanding why commercial emergency lighting installation matters can also help facility teams plan coverage, support safe egress, and maintain reliable emergency lighting systems.
The inventory should distinguish between illuminated exit signs and emergency luminaires. It should also identify units connected to battery backup, central battery systems, generators, transfer equipment, or other emergency power arrangements when those systems are present. Keep this condition visible on the emergency lighting testing checklist.
If a fixture has a remote head, include the head locations rather than recording only the main enclosure.
This step matters because missed fixtures are one of the easiest ways for a testing program to appear complete when it is not. Renovations, tenant improvements, reconfigured corridors, and changes in occupancy can leave a facility with lighting locations that do not match older floor plans or prior inspection sheets.
A visual review should occur before or during functional testing. Look for cracked housings, loose covers, missing lenses, corrosion, impact damage, exposed conductors, and signs of overheating.
Confirm that exit legends and directional indicators are visible from the intended approach and are not blocked by temporary signs, decorations, stored materials, racking, shelving, or construction barriers. Use the emergency lighting testing checklist to track this step.
A fixture can pass a simple illumination test and still be poorly positioned for the people who need it. For example, a newly installed partition may block an exit sign, or a storage rack may reduce visibility along a route that was clear when the original system was approved.
Facility teams should treat layout changes as a reason to review emergency lighting coverage rather than waiting for the next scheduled test.
The central question is whether the equipment operates when normal power is unavailable. Testing may involve a local test switch, a controlled interruption of normal power, a system test function, or another method appropriate for the equipment.
The method should avoid creating unnecessary risk and should not disrupt critical operations without coordination. Add this item to the emergency lighting testing checklist.
During the test, confirm that the expected fixtures illuminate, exit signs remain visible, and remote heads or other connected components function as intended. Pay attention to delayed operation, flickering, uneven brightness, unusual sounds, warning indicators, and fixtures that fail to transfer from normal to emergency mode.
Testing should not be reduced to observing whether a lamp comes on for a few seconds. The test must be long enough and structured appropriately to reveal relevant battery or system problems, subject to the requirements that apply to the installation.
If the equipment’s test indicator suggests a fault, record the fault even when the lamp appears bright. Use the emergency lighting testing checklist to track this step.
Battery condition is a common source of emergency lighting failure. Batteries can lose capacity with age, heat exposure, charging problems, or repeated discharge. A unit may illuminate briefly while lacking the capacity needed for the applicable emergency duration.
That is why battery backup light testing should evaluate more than the presence of light at the fixture.
Inspect battery connections, charging indicators, compartment condition, dates or identifying information where available, and evidence of leakage or swelling. Do not handle damaged batteries casually. Follow appropriate safety procedures and the equipment manufacturer’s instructions, and involve qualified personnel when replacement or electrical work is needed. Fire Hydrant Flow Testing can also help evaluate whether hydrant water flow and pressure meet expected system requirements.
The charger, inverter, transfer function, lamps, LEDs, test switch, and control circuitry also deserve attention. Replacing a battery without investigating a charging or transfer fault can produce a repeat failure. The emergency lighting testing checklist should include this detail.
Good emergency exit light testing looks for the reason a unit failed, not merely the component that was easiest to replace.
Stay Compliant And Safe
Many facilities ask how often exit light testing must occur. The safest answer is that frequency and duration depend on the applicable adopted codes, local enforcement practices, equipment design, occupancy, and the building’s documented life safety program.
A schedule should be confirmed with the authority having jurisdiction and aligned with the manufacturer’s instructions rather than copied from a generic online calendar. Keep this condition visible on the emergency lighting testing checklist, and choose the best emergency lighting service based on applicable requirements, system needs, technician qualifications, and documented testing practices.
Even when a recurring schedule is established, the quality of each test matters. A missed fixture, incomplete record, or unresolved failure can undermine the purpose of the program. Treat the schedule as a year-round control process instead of a once-a-year administrative task.
Building personnel can often perform basic visual observations and report obvious problems, provided they understand the limits of their role. A routine check may identify a dark exit sign, a missing lens, a visible fault indicator, physical damage, blocked visibility, or a fixture that appears out of service.
These observations are valuable between formal service visits. However, they should not be represented as a complete technical inspection if the person performing them has not been trained or authorized to evaluate electrical and emergency power systems. The emergency lighting testing checklist should include this detail when planning or reviewing commercial emergency lighting lnstallation.
A simple walk-through can find visible deficiencies; it may not verify battery capacity, circuit integrity, transfer operation, or the full emergency lighting duration. Use the emergency lighting testing checklist to track this step.
A scheduled functional test should verify that the emergency lighting system responds when normal power is interrupted through an approved and controlled method. The test record should identify the date, person or company performing the work, fixtures or areas tested, test method, observed results, and any deficiencies.
For larger properties, divide the building into logical zones. Testing by floor, tenant area, stair enclosure, or electrical distribution area can make deficiencies easier to locate and reduce the chance of skipping remote fixtures. A zone-based plan also helps coordinate testing around occupancy, security procedures, production schedules, and tenant access.
Some emergency lighting programs require a longer-duration test at an established interval. The purpose is to evaluate whether the system continues operating for the duration required by the applicable standard or building program, not just whether it starts correctly. Review this point through the emergency lighting testing checklist.
Because a longer test can affect batteries, building operations, and emergency power arrangements, it should be planned and documented carefully.
Before performing a duration test, confirm which fixtures are included, whether generator-backed equipment is involved, how normal power will be interrupted, and what restoration checks are needed afterward.
The person responsible should know how to recognize a failed duration test and what temporary measures may be necessary while repairs are pending.
A unit that passes a short functional check but fails during a longer test has provided important information: the system can start, but it may not sustain the required output. That distinction should appear clearly in the report. Add this item to the emergency lighting testing checklist.
Some properties have mixed systems, central batteries, automatic transfer equipment, monitored emergency circuits, or fixtures integrated with broader life safety controls. A straightforward local test may not prove that every part of the system operates correctly.
New construction, major remodeling, electrical work, tenant build-outs, and changes to egress routes can also require a broader review. The emergency lighting testing checklist should include this detail.
If the test causes repeated trips, unexpected alarms, loss of normal lighting, or uncertainty about what equipment is being controlled, stop and obtain qualified assistance. The goal is to verify emergency lighting without creating a separate operational or electrical hazard.
This section connects emergency lighting testing checklist with the next practical step for the facility. Reviewing current records, system conditions, access needs, and unresolved deficiencies gives property teams a clearer basis for deciding what to inspect, test, maintain, repair, or discuss with FirePro Tech, LLC.
Ensure Safety with Expert Emergency Lighting Services
The most reliable testing process follows a consistent sequence. It begins with preparation, moves through physical and functional checks, and ends with restoration and documentation.
Skipping the final steps is a common mistake: a test may identify a failed fixture, but the building team may not know whether it was repaired, isolated, or left unresolved.
Gather the current fixture inventory, floor plans or route information, prior reports, access instructions, and the manufacturer’s information available for the installed equipment. Identify areas that require escorts, security coordination, tenant notice, infection-control procedures, or after-hours access. Use the emergency lighting testing checklist to track this step.
Determine whether normal lighting, security systems, elevators, access controls, fire alarm interfaces, production equipment, or other building functions could be affected. Emergency lighting testing should be coordinated so that a controlled test does not create confusion about a real power event or leave an occupied area in an unsafe condition.
The tester should also know how normal power will be restored and how to confirm that each fixture has returned to its normal charging or monitoring state. A failed restoration can leave a system apparently operational while the batteries are not recharging.
Add this item to the emergency lighting testing checklist.
Work through the property in a defined direction rather than moving randomly from one visible fixture to another. At each location, compare the installed equipment with the inventory and record any change. Verify the fixture’s physical condition, lens or faceplate, mounting, visibility, directional indication, and apparent readiness.
For an illuminated exit sign, check whether the legend is complete and readable from the approach direction. For an emergency luminaire, check whether the heads aim toward the intended path and whether nearby construction or storage has changed the coverage. Review this point through the emergency lighting testing checklist.
For remote heads, verify each head rather than assuming that the main unit represents the entire assembly. Add this item to the emergency lighting testing checklist.
Use the equipment’s intended test method or an appropriate controlled power interruption. Observe the transfer into emergency mode and note whether the fixture illuminates immediately or as expected. Check for flicker, intermittent operation, weak output, abnormal indicator behavior, and differences between connected heads.
Do not rely on a single person’s memory. A second person may be useful in stairwells, long corridors, loading areas, or spaces where the person at the test point cannot see the entire path. Communication is especially important when testing involves electrical rooms, multiple floors, or areas with restricted access.
If a fixture fails, identify the failure precisely. “Bad light” is not enough for a useful work order. Record whether the problem appears to involve the lamp or LED module, battery, charger, test switch, housing, wiring, transfer function, remote head, or visibility.
If the cause is uncertain, record the observed symptom without guessing. Include this check on the emergency lighting testing checklist.
After emergency exit light testing, restore normal power and verify that the fixture returns to its normal operating and charging condition. Check that no fault indicator remains active and that the test switch or control function has not been left in an abnormal position.
Walk the tested area again when appropriate. Confirm that normal illumination, emergency illumination, access controls, and any related systems are in their expected state. A facility should not be considered finished merely because the test event ended; restoration is part of the test.
Review this point through the emergency lighting testing checklist.
Not every deficiency has the same operational consequence. A missing exit sign in a primary egress route, a failed fixture in a stairwell, and cosmetic damage on a noncritical housing should be evaluated in context. That does not mean minor defects should be ignored.
It means the correction plan should prioritize conditions that could impair safe evacuation or indicate a broader system problem. The emergency lighting testing checklist should include this detail.
When repairs cannot be completed immediately, document the condition, the affected location, the interim control, the responsible party, and the planned follow-up. Requirements for temporary measures can vary, so confirm the appropriate response with the responsible safety professional and authority having jurisdiction.
Avoid assuming that placing a portable light or posting a sign automatically resolves a deficient permanent system.
This section connects emergency lighting testing checklist with the next practical step for the facility. Reviewing current records, system conditions, access needs, and unresolved deficiencies gives property teams a clearer basis for deciding what to inspect, test, maintain, repair, or discuss with FirePro Tech, LLC.
Testing is most effective when it is managed as part of the facility’s ongoing fire safety services and maintenance program. A written process helps prevent missed dates, unclear responsibilities, incomplete records, and repeated temporary fixes.
It also gives property managers a practical way to coordinate work across multiple tenants or buildings. Treat this as a routine emergency lighting testing checklist item.
Identify who owns the program, who schedules testing, who provides access, who reviews reports, and who authorizes repairs. In a leased property, responsibilities may be divided among the owner, property manager, tenant, electrical contractor, fire protection services, or maintenance team.
Written responsibility prevents the assumption that someone else is handling the next test.
For multi-building portfolios, keep a separate inventory and testing history for each address. Do not combine records so broadly that a reviewer cannot tell which fixtures were examined at a particular property. The emergency lighting testing checklist makes this step easier to document.
Houston-area facilities may also have different building conditions, occupancies, renovations, and local review expectations, so a single generic checklist may need property-specific adjustments. Use the emergency lighting testing checklist to track this step.
A useful record should show what was tested and what happened. At a minimum, maintain the property and area, fixture identification, date, test type, result, deficiencies, corrective action, and person or company responsible. Include repair documentation, replacement information, follow-up testing, and any communication needed to close the issue.
Retain records according to the applicable code, contract, company policy, and authority having jurisdiction. Digital records can be effective when they are backed up, searchable, access-controlled, and tied to identifiable locations.
Photos may help document blocked visibility, physical damage, or completed corrections, but a photo should supplement—not replace—a complete test record. Keep this condition visible on the emergency lighting testing checklist.
One failed fixture may need a repair. A cluster of failures can indicate a larger issue such as battery age, heat exposure, charging problems, water intrusion, vibration, poor installation, or an unsuitable maintenance approach. Look for patterns by floor, manufacturer, fixture type, battery age, or electrical zone.
A recurring failure deserves more than repeated component replacement. Ask whether the underlying cause has been investigated and whether the fixture remains appropriate for the current layout. A renovation may have changed the egress path, ceiling height, partitions, or visibility requirements.
Maintenance should keep pace with the building, not just with the previous inspection sheet. The emergency lighting testing checklist makes this step easier to document.
Emergency lighting does not operate in isolation from the rest of a facility. A broader maintenance plan may need to coordinate exit and emergency light testing with fire alarm inspection, emergency power work, electrical maintenance, generator testing, construction activity, and occupancy changes.
The exact coordination depends on the property and the systems installed.
The practical benefit is fewer conflicting work orders and better documentation. If a generator, transfer switch, or emergency circuit is serviced, the facility should understand whether emergency lighting was affected and whether an additional verification is appropriate. Treat this as a routine emergency lighting testing checklist item.
Likewise, if a corridor or stairwell is remodeled, the lighting inventory and route review should be updated rather than deferred indefinitely.
Professional assistance is appropriate when the system is complex, records are missing, failures recur, the test method is unclear, electrical access is restricted, or the building needs organized inspection and corrective-action support.
FirePro Tech, LLC provides emergency and exit lighting services for customers who need help evaluating, testing, maintaining, or documenting these systems, subject to the scope of the property and applicable requirements. Treat this as a routine emergency lighting testing checklist item.
A qualified service provider should be able to explain what will be tested, what access is needed, how deficiencies will be reported, and what information the facility will receive afterward.
Asking these questions before scheduling helps avoid a visit that checks only the most visible fixtures while leaving the broader compliance process uncertain.
This section connects emergency lighting testing checklist with the next practical step for the facility. Reviewing current records, system conditions, access needs, and unresolved deficiencies gives property teams a clearer basis for deciding what to inspect, test, maintain, repair, or discuss with FirePro Tech, LLC.
Call Today for Expert Emergency Lighting Compliance
The right next step depends on the condition of the system and the quality of the existing documentation. Some facilities need a routine recurring test. Others need an inventory correction, a deficiency-focused inspection, or a broader evaluation after a renovation or power-system change.
Making that distinction prevents both under-testing and unnecessary disruption. Treat this as a routine emergency lighting testing checklist item.
When records are current, fixtures are clearly identified, prior deficiencies are closed, and the testing method is established, continue the recurring schedule. Review the inventory whenever the building changes. Confirm that new fixtures, removed fixtures, tenant improvements, and altered egress routes are reflected in the next test cycle.
A complete program still benefits from periodic review. Staff turnover, management changes, and contractor changes can cause a process to weaken even when the equipment itself has not changed. Keep instructions easy to find and ensure the person coordinating access understands the scope of the property.
Do not try to recreate compliance history by filling in dates from memory. Begin with a current inventory and condition assessment. Identify what can be verified, what remains unknown, and what must be tested to establish a reliable baseline. Include this check on the emergency lighting testing checklist.
This approach may uncover fixtures that were never included in older records or equipment that has been disconnected, relocated, or damaged. It also gives the facility a defensible starting point for future maintenance.
The objective is not to make paperwork look complete; it is to create records that accurately reflect the building. The emergency lighting testing checklist makes this step easier to document.
Record the failed location and symptom, protect the affected area as appropriate, and arrange corrective action. Do not assume that replacing a lamp or resetting a test switch solves the issue. A battery, charger, wiring, transfer component, or remote head may be involved.
After repair, perform the applicable follow-up test and retain the result with the original deficiency. If the failure affects a critical egress area or multiple fixtures, escalate the issue promptly. Add this item to the emergency lighting testing checklist.
The appropriate temporary control and repair timeline may depend on the building, occupancy, local requirements, and direction from the authority having jurisdiction.
Renovations, tenant build-outs, new partitions, changed storage, altered stair access, electrical modifications, and occupancy changes should trigger a review of emergency lighting coverage. The fixtures may still work, but their locations may no longer support the intended route or visibility. Review this point through the emergency lighting testing checklist.
Ask whether the current installation matches the approved plans and the facility’s present use. When the answer is uncertain, coordinate with the relevant design professional, electrical contractor, fire protection specialist, and authority having jurisdiction as needed.
Testing alone cannot correct a layout that no longer serves the people using the building. Keep this condition visible on the emergency lighting testing checklist.
When you need emergency lighting compliance support in Houston, FirePro Tech, LLC can help you organize the practical next step, whether that involves inspection, testing, maintenance, installation-related support, or documentation review within the agreed service scope.
Provide the property address, building type, number of areas or floors, known failures, recent changes, and available records so the scope can be evaluated accurately.
The Fire Protection System Market was valued at USD 67.35 billion in 2023 and is expected to reach USD 116.17 billion by 2032, expanding at a CAGR of 6.25% during the 2024–2032 forecast period.
An emergency lighting testing checklist should do more than confirm that a few fixtures turn on. It should guide a complete review of visibility, physical condition, emergency operation, battery performance, system restoration, documentation, and corrective action.
The exact emergency exit light testing requirements vary, so your schedule and test method should be confirmed against the applicable requirements for the building, equipment, jurisdiction, and authority having jurisdiction.
For Houston businesses and property teams, year-round organization is the practical advantage. Keep the inventory current, test every identified location, investigate repeat failures, document repairs, and revisit the system after building changes.
FirePro Tech, LLC can support emergency and exit lighting testing, maintenance, installation-related needs, and compliance-focused service planning when professional assistance is appropriate. A clear process helps you make informed decisions before an emergency exposes a gap.
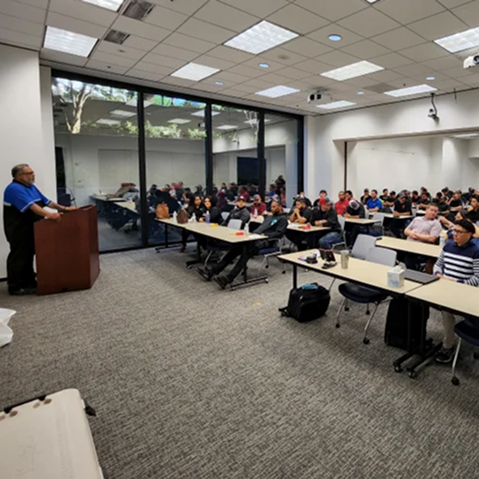
It should identify every fixture, verify visibility and physical condition, test emergency operation, review batteries and indicators, confirm restoration, document failures, and track corrective action.
Testing frequency varies by adopted code, jurisdiction, equipment, occupancy, and the authority having jurisdiction. Establish the schedule from applicable requirements and manufacturer instructions rather than a generic calendar.
Testing may check illumination, transfer to emergency power, battery or charger condition, remote heads, exit legend visibility, damage, fault indicators, and return to normal charging after the test.
The required duration depends on the applicable standard, building conditions, and system design. Short functional checks and longer-duration tests serve different purposes and should be planned accordingly. Include this check on the emergency lighting testing checklist.
Document the fixture and observed failure, evaluate the affected egress area, arrange qualified corrective work, and perform follow-up testing. The appropriate interim response can vary by building and local direction.
Staff may perform basic visual checks when trained and authorized, but technical testing can require qualified personnel, controlled power interruptions, electrical access, and system-specific knowledge. Include this check on the emergency lighting testing checklist.
Professional support is especially useful when records are missing, systems are complex, failures recur, or renovations changed egress routes. FirePro Tech, LLC can evaluate the appropriate service scope.
Keep fixture locations, test dates and types, results, deficiencies, repairs, follow-up tests, and responsible parties. Records should be searchable, protected, and retained according to applicable requirements and policy.
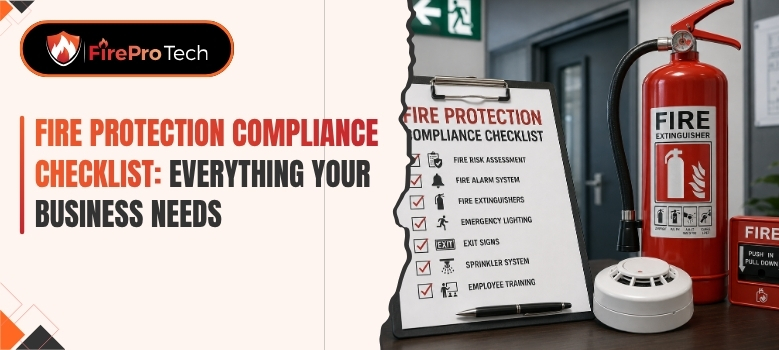
Fire protection compliance checklist planning can help your business find missed inspections, unresolved deficiencies, incomplete records, and system conditions that may affect safety or approval.
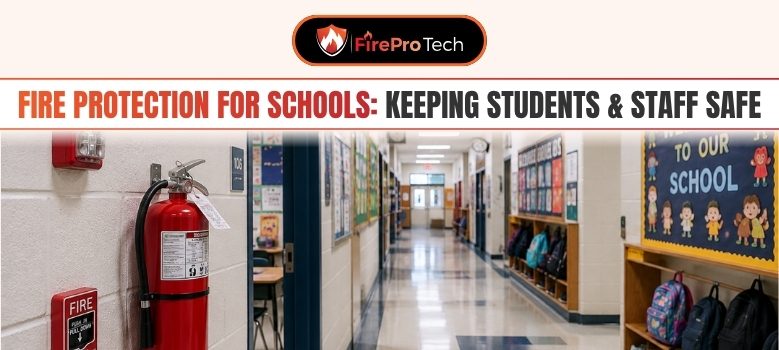
Fire protection for schools is a daily responsibility for administrators, facility managers, and school leaders who must protect students, staff, visitors, and the continuity of education.
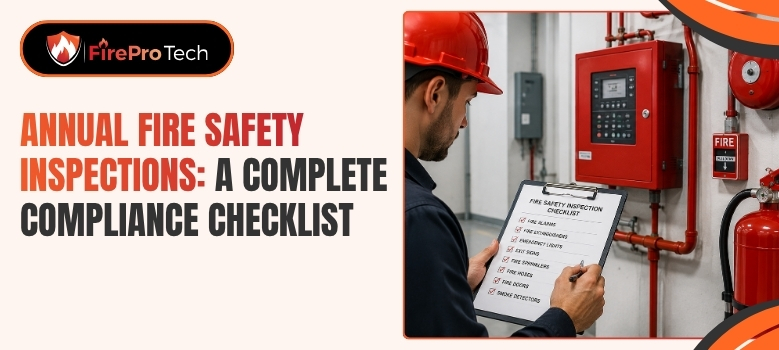
Annual fire safety inspections are meant to help businesses identify life-safety deficiencies before they become emergencies, failed inspections, or operational disruptions.